Video drives a 157% increase in traffic from search engines; it generates 1200% more shares than texts and images on social media; it’s been shown to double conversions, and 55% of people watch online video every day.
And it’s even estimated that by 2018, video will account for 78% of consumer Internet traffic.
Thankfully, the barrier to entry for shooting HD video is so low that all you need is an iPhone and $200. (Don’t have one? Someone in your practice will.)
If you’re using an iPhone 5/5s/6/6s/Plus, then your camera uses an 8-megapixel camera that shoots 1080p HD video. So video quality on your iPhone matches some professional cameras.
The best part?
Your iPhone is compact, lightweight, and easy to use; any experience or skill level can shoot professional HD video with an iPhone.
Let’s get started.
Step 1: Set up

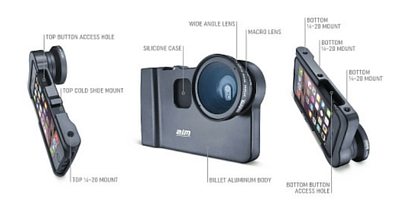
Since the standard lens on the iPhone is narrow, it helps to use a wide-angle lens attachment so you can capture a wider shot indoors. And since you’ll want a steady and stable shot, you’ll need to use a tripod to mount your iPhone.
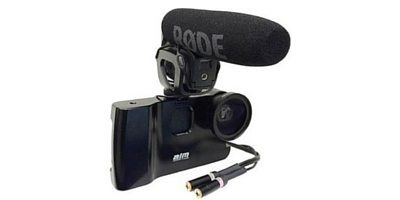
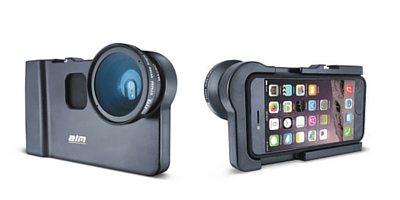
Luckily, ALM makes an iPhone filmmaker starter kit called the mCAMLITE Pro Pack that includes an aluminum case, a wide-angle lens attachment, and a tripod and accessory mount. (Tripod not included).
Just screw the mCAM frame to the tripod, screw on the wide-angle lens, then point and shoot.
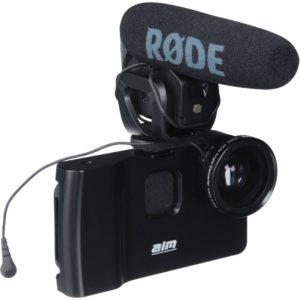
The ALM mCAMLITE iPhone Filmmaker Pro Pack
What to buy:
1). iPhone or iPod Touch: Storage capacity doesn’t matter. A 16GB or 32GB iPhone/iPod will both work since you can export your videos to your desktop and then delete them from your phone.
2). ALM mCAMLITE Filmmaker Pro Pack:
• For the iPhone 6/6s/6 Plus (includes iPhone video case, pro microphone (Rode VideoMic Pro), wide-angle lens, and mic adaptor cable)
• For the iPhone 5 (includes iPHone video case, pro microphone, wide-angle lens, and mic adaptor cable). Note: If you use a lavalier mic (see next section), you’ll only need the mCAMLITE iPhone video case, not the adaptor or RodeVideoMic Pro.
• For the iPod Touch (pro microphone not included);
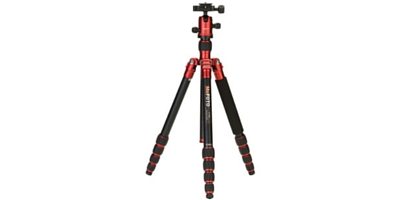
3). Standard Tripod with [1/4”-20 thread] attachment (We use the meFOTO Travel Tripod, but you can find a tripod in the $30-50 range that will do the job).
Step 2: Audio

After you have your iPhone mounted and stabilized, and the lens optimized for wide-angle shots, it’s time to add professional audio.
The iPhone’s internal microphone doesn’t do a good job of blending the ambient sound in the room with the subject’s voice unless you’re extremely close to the microphone. So you’ll need a better microphone that creates a more natural sound when you speak.
Two options: the shotgun mic or the lavalier mic (collar clip-on)
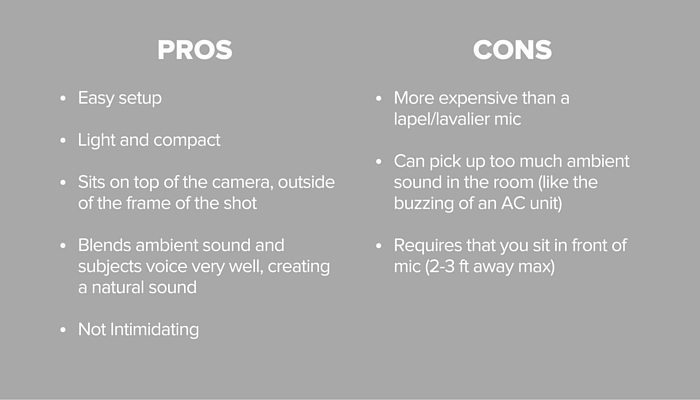
1). Shotgun mic
I recommend the Rode VideoMic Pro. First, it sounds great and only costs around $230. Second, it attaches directly to the top of the ALM mCAMLITE.
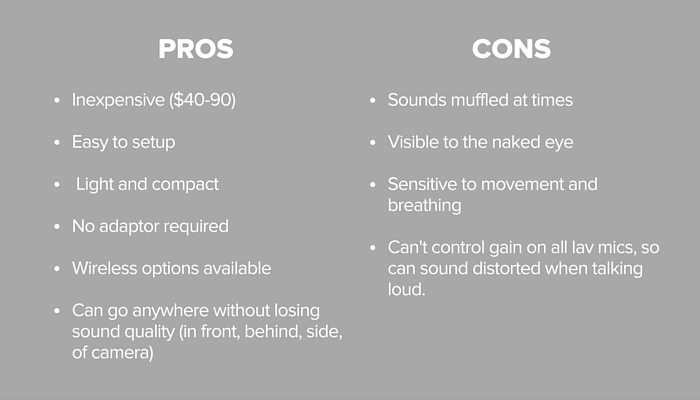
2). Lavalier mic:
I recommend the Rode SmartLAV or the Savage Smartphone Lavalier Mic.
While the Rode SmartLAV provides a better quality sound than the Savage, the Savage get’s the job done for half the price ($40).
What to buy
You only need one mic, but it never hurts to buy both the Rode VideoMic Pro shotgun mic and a lavalier mic. Having access to both will give you more freedom with the types of shots you can capture.
1). ALM mCAMLITE Filmmaker Pack: Again, ALM sells a bundle called the mCAMLITE Filmmaker Pro Pack that includes the wide-angle lens, iPhone video case, Rode VideoMic Pro microphone, and a mic adaptor cable. (See Step One for links to where to purchase).
However, if you choose to use the lavalier mic approach, you don’t need an adaptor cable or the Rode VideoMic Pro shotgun mic.
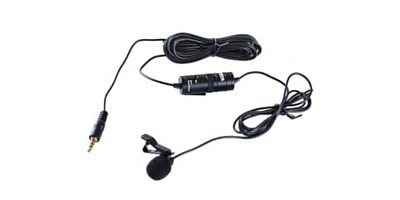
2). Rode SmartLAV: This lavalier mic doesn’t require an adaptor and plugs directly into your iPhone. It costs $90 and provides the best audio quality of all the smartphone lavalier microphones. (Note: I prefer the SmarLAV over the Rode VideoMic Pro.)
3). Savage Smartphone Lavalier Mic (Clip-On Omnidirectional): While the Savage lavalier mic doesn’t sound as good as the Rode SmartLAV, it only costs $40 (half the price of the SmartLAV).
4). If you use the lavalier mic approach, you will still need to purchase the ALM mCAMLITE case with the wide-angle lens (not the bundle that includes the microphone and adaptor cable since you won’t need either). This cost about $90.
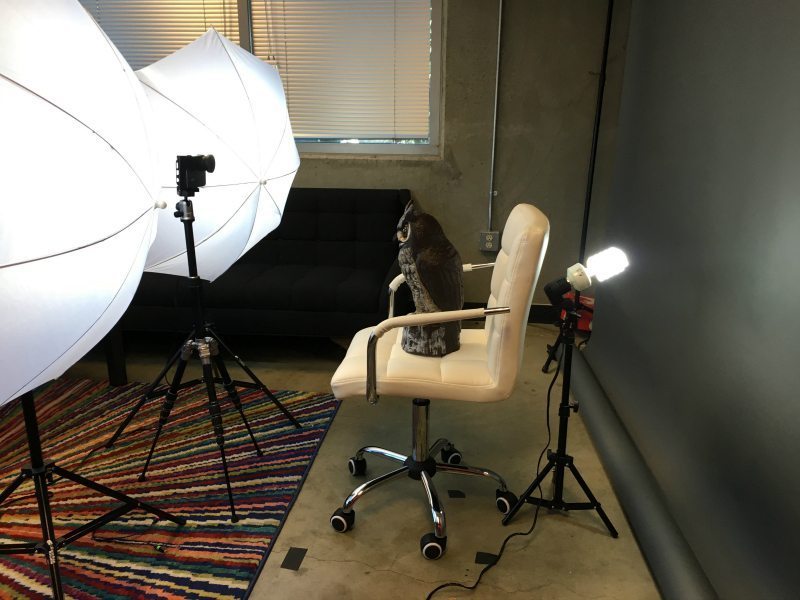
Step 3: Lighting and Backdrop

First things first: if you setup your video rig in an area of your practice or home where direct sunlight will shine on the front of your subject (e.g. there’s a window that allows sunlight to enter straight on with the subject), then lighting might not be necessary.
However, bad lighting can ruin your entire video. And since it only costs around $300 to put together an easy-to-use professional light kit with a professional backdrop, it makes sense to make the purchase.
What to buy:
1). Savage Seamless Backdrop Paper (10ft): This backdrop cost $30-50 and absorbs light rather than reflect it, and it comes in dozens of different colors.

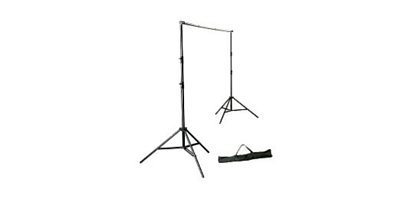
2). Photoflex Studio Backdrop Support Kit: Every backdrop needs a stand; this one is the sturdiest stand on the market and costs $188.
3). Impact Photo Portrait Studio Kit: For $157, this studio lighting kit will provide your video footage with all the proper lighting necessary.
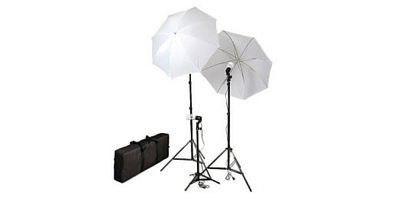
4). Gaffer Tape: You never know when you’re going to need multi-purpose tape when setting up your light or backdrop- not to mention using gaffer tape to mark camera position and subject position will help create consistency with your shots. And it only costs $20.
Tip: Always use front lighting on your subject, either with your umbrella lighting kit or with natural sunlight via a window. If you use sunlight, just make sure you account for time of day: noon is the best time for natural lighting. (Also, don’t forget that you’re on a clock with natural lighting! Which means front light at noon will not be in the same spot as front light at 4pm.)
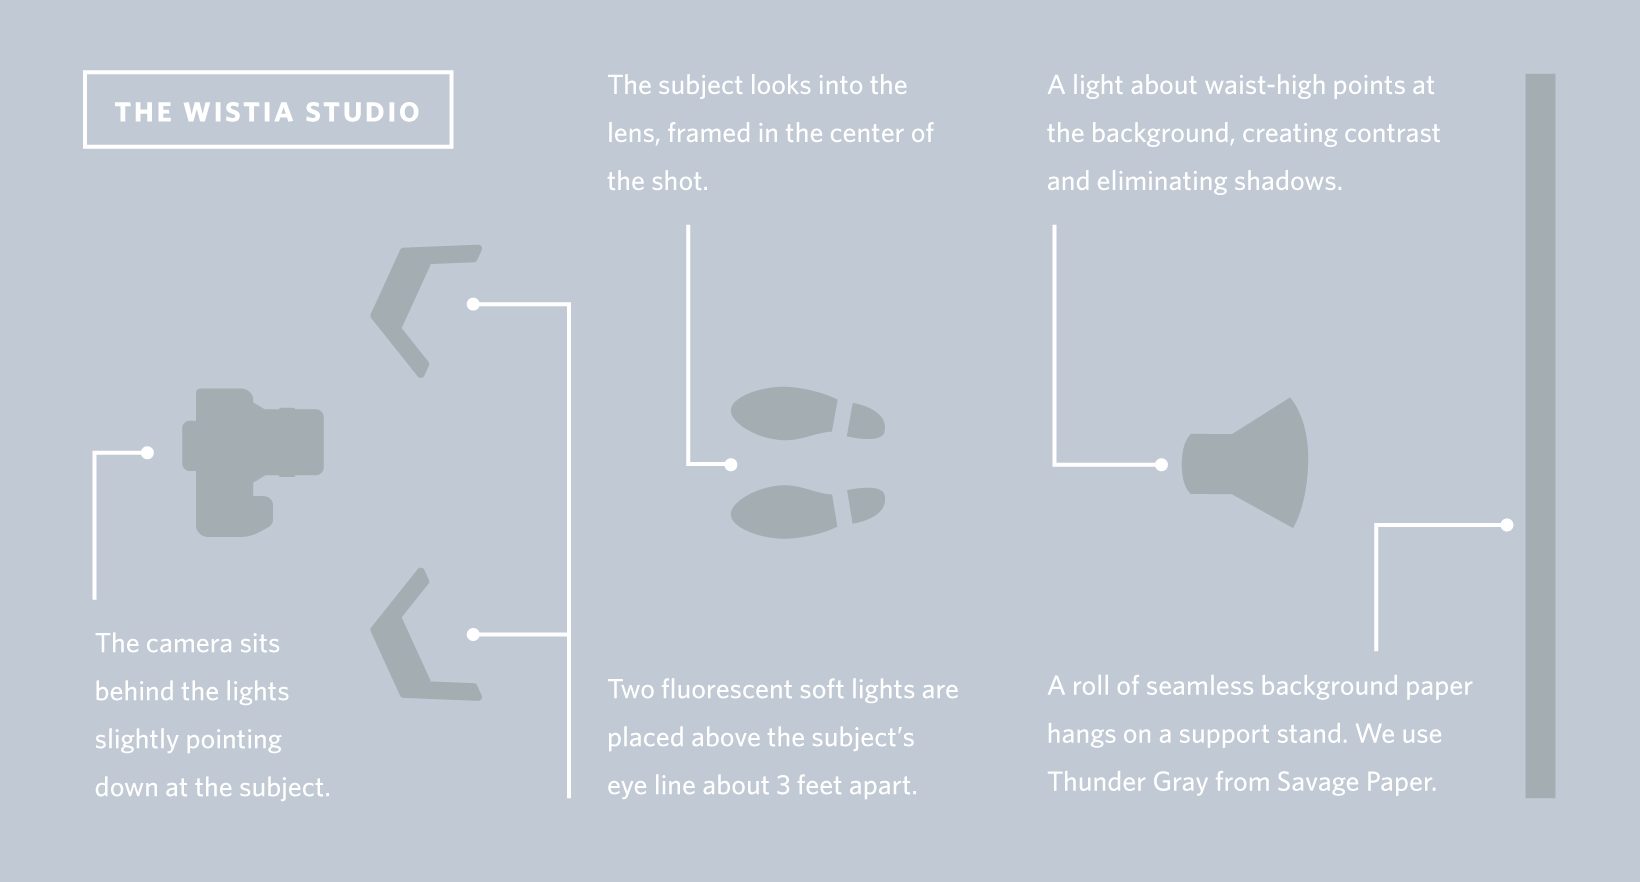
Positioning your lights, camera, backdrop, and subject
Wistia wrote the book on positioning your camera, lights, backdrop, and subject, so I’ll just leave this here:

Step 4: Record

Now that you have your iPhone rig setup with professional audio, lighting, and a backdrop, it’s time to point and shoot.
But before you hit record, download the FiLMiC Pro App ($9.99) in the app store or on iTunes and use it as your video recording interface instead of the iPhone’s standard video app.
Why?
If you pull out your iPhone and shoot a video, you’ll notice that your phone automatically adjusts focus and exposure (lighting). And as you move the camera, it adjusts focus and exposure along with it.
With FiLMiC, you can override your iPhone’s focus, exposure, and white balance so you can have full control of your shot.
While there’s a lot you can do with FiLMiC, you only need to know how to set your (1) focus, (2) exposure, and (3) white balance:
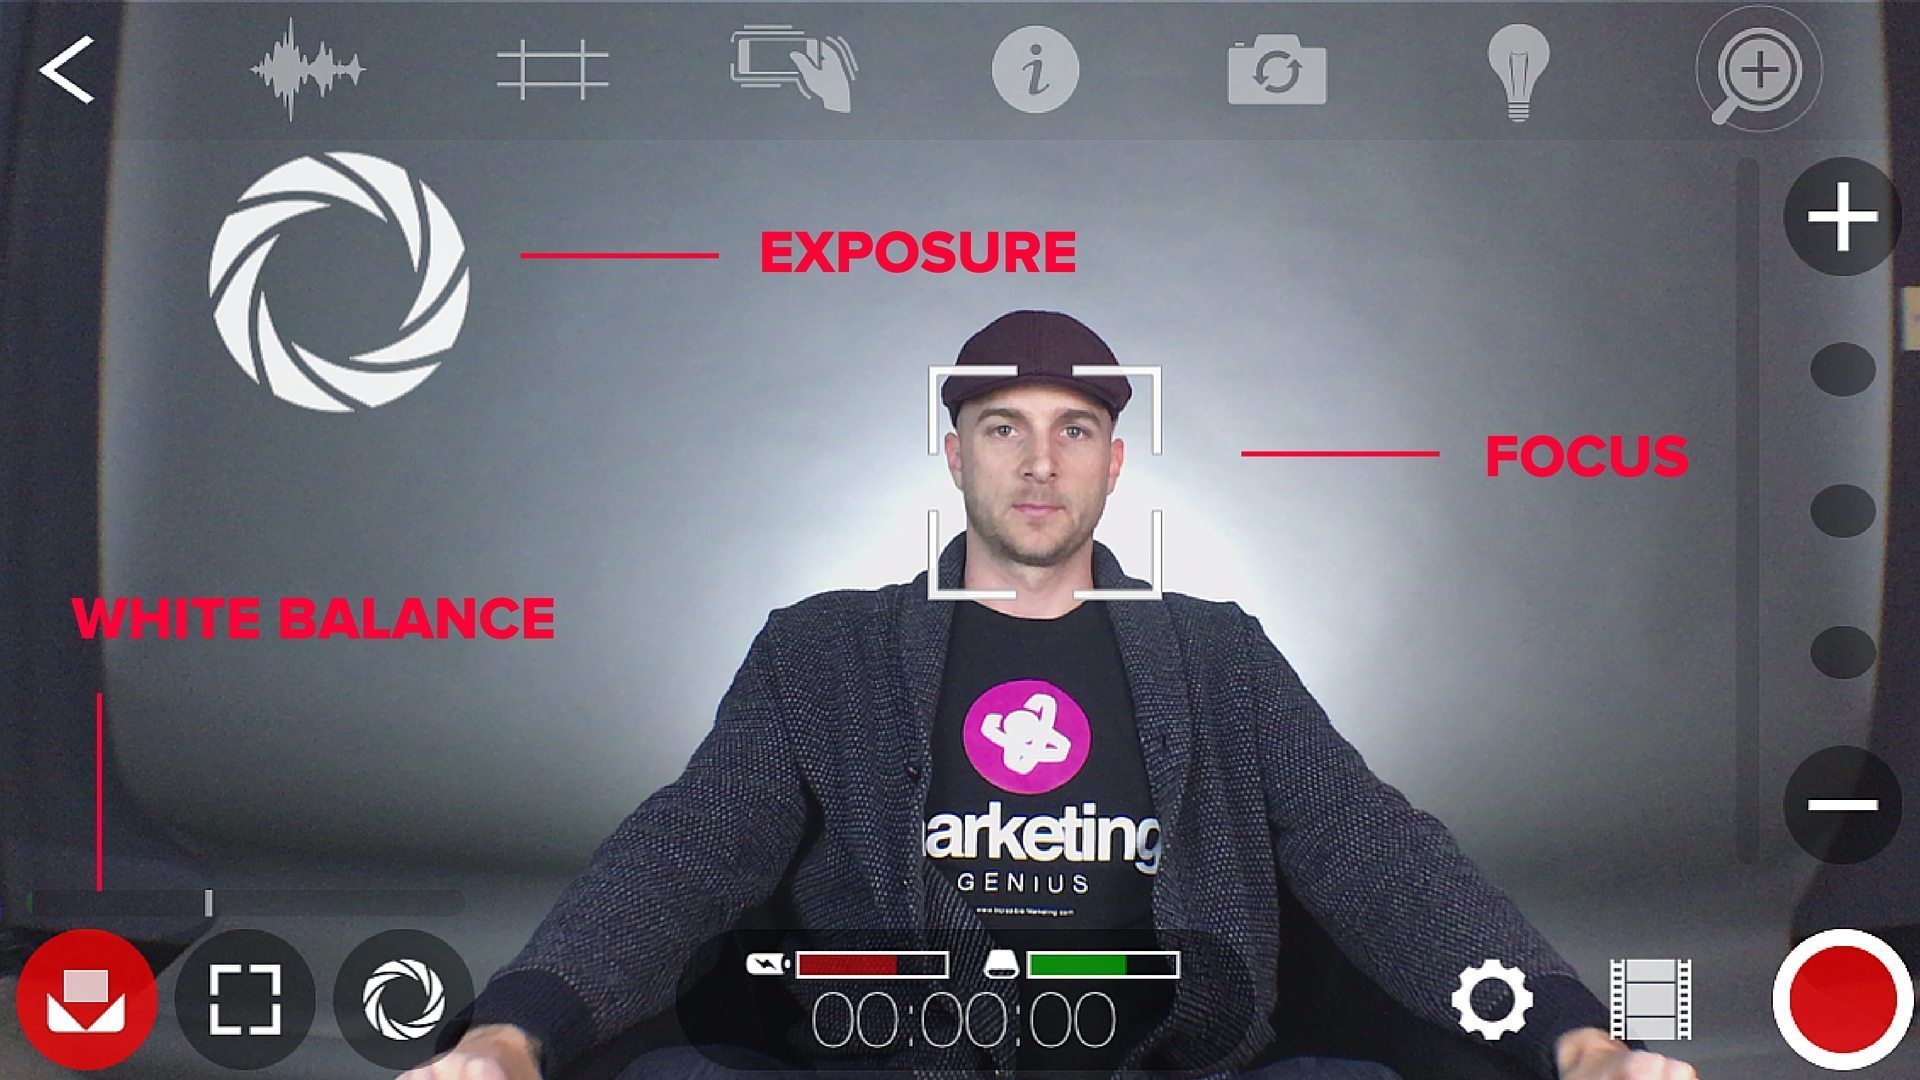
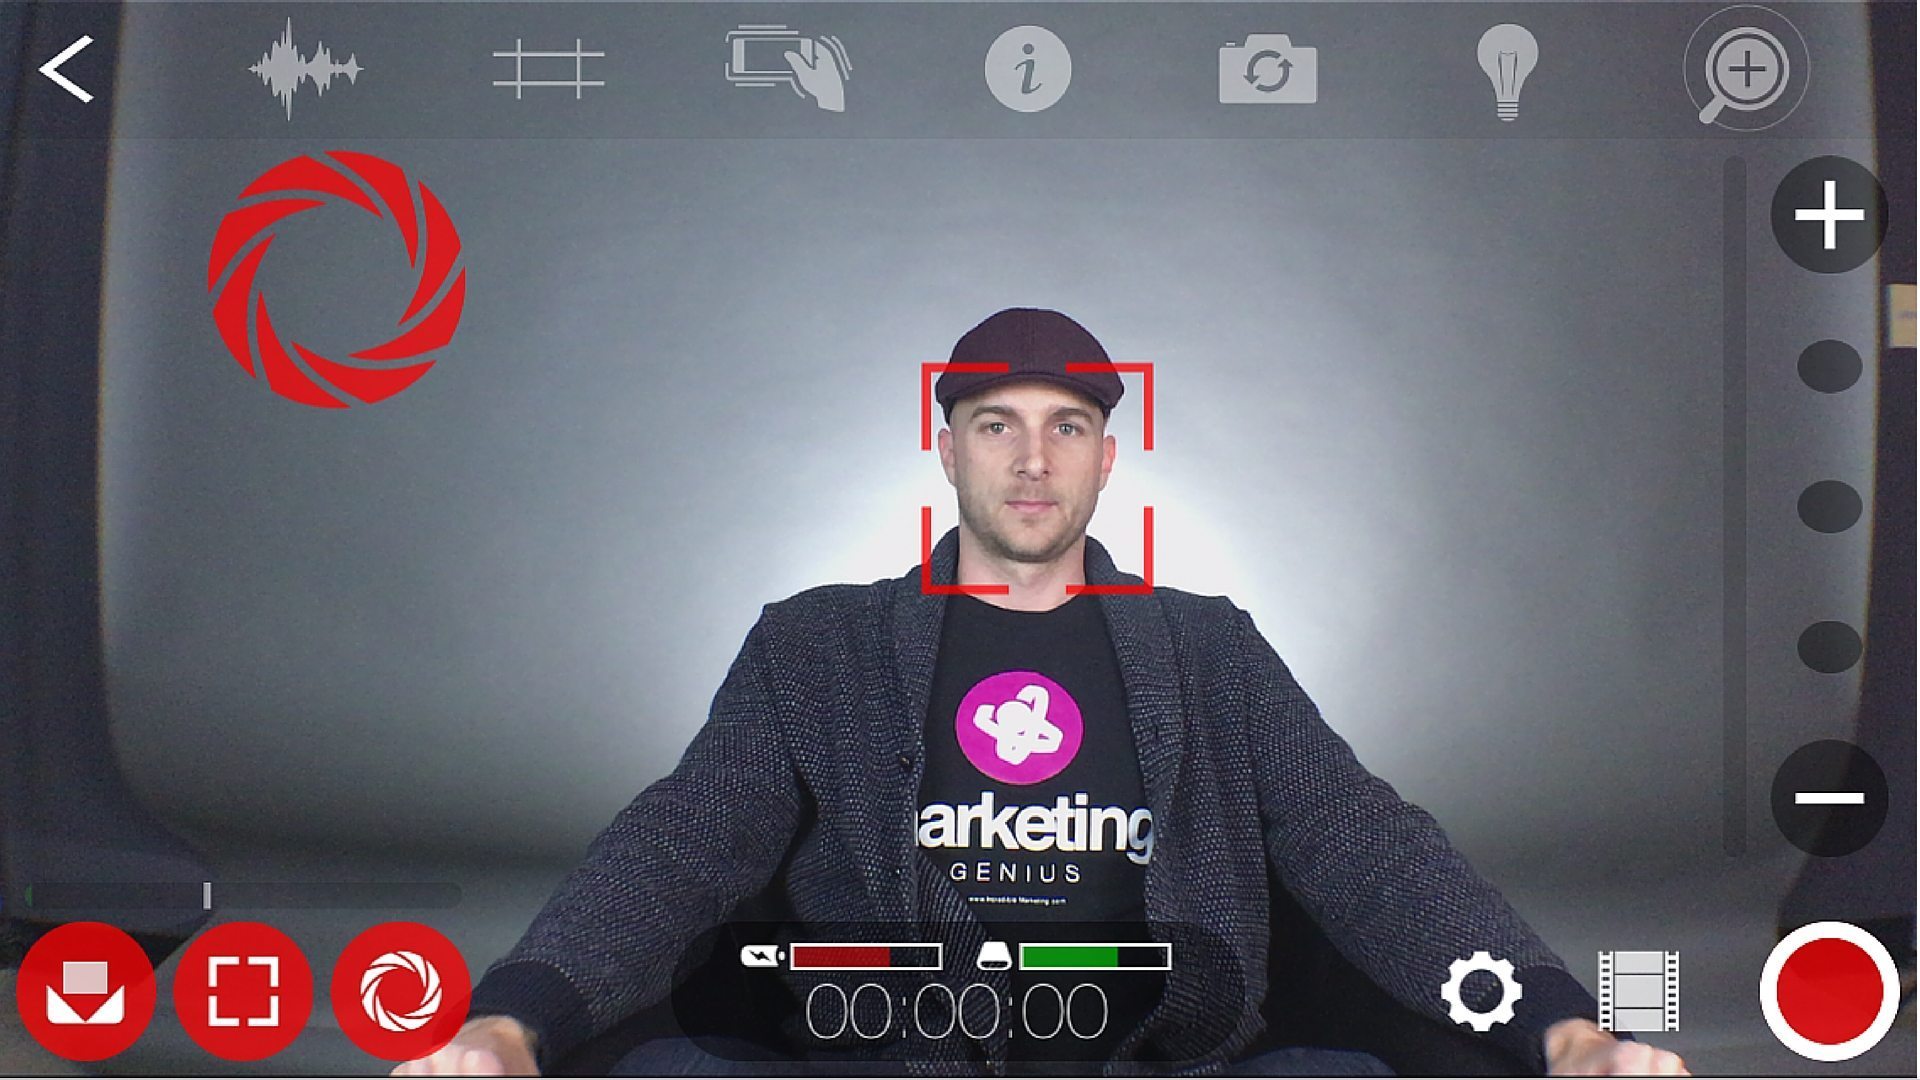
Tap each feature to lock
Now you’re ready to start shooting.
To export your videos from FiLMiC onto your computer, just open your computer, launch iTunes, select your iPhone under “Devices” on the left, select Apps from the top menu, then select FiLMiC pro under File Sharing. Viola!
PS: Download the FiLMiC user guide here for more tips!
Tips for Recording:
1). Try to record your entire video in one shot. This will cut down the amount of time needed to edit your footage in post-production. And it definitely helps to script your video beforehand.
2). Don’t use the zoom feature on your iPhone or within FiLMiC Pro. Since your iPhone doesn’t zoom optically (the lens doesn’t move), all you’ll do is pixelate your image.
3). Always make sure to lock the focus and exposure in FiLMiC Pro.
4). Don’t let perfection be the enemy of good: It’s ok to be human in your videos, so don’t stress over the occasional “um” or “ah.” Keep it rolling.
5). Start small: Before you try shooting an 8-minute video with B-role, start small with quick tips, how-tos, tutorials, and patient testimonials.
Happy Shooting!
Incredible Marketing
Incredible Marketing